
So it’s time for the drumroll :) And I’m very happy to announce that I feel very privileged to work together with Dedri from lookatwhatimade on this new pattern for you. If you’re a regular reader you might remember the cute little blanket I made for my friends little one. Well, the blanket was a huge success, not only with the mum but also with the little one. Grace is very much loved and had to be protected from getting “stolen” by other kids in the baby group. So when I saw her the last time I was thinking about how much fun it would be if she would have a little Grace rattle to go with her blanket. So that’s how the idea was born, it needed a little bit of tweaking and here it is :)
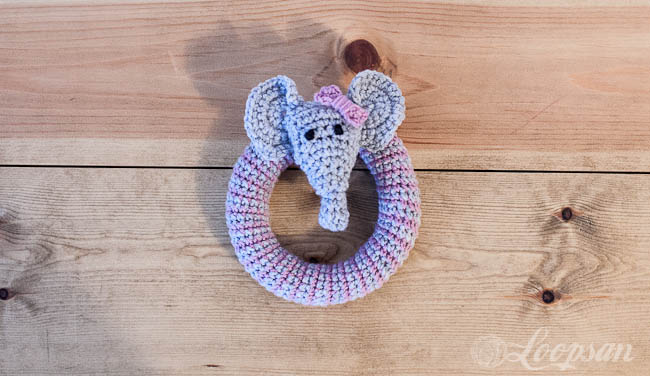
Grace – The little elephant rattle
Suitable for an advanced beginner
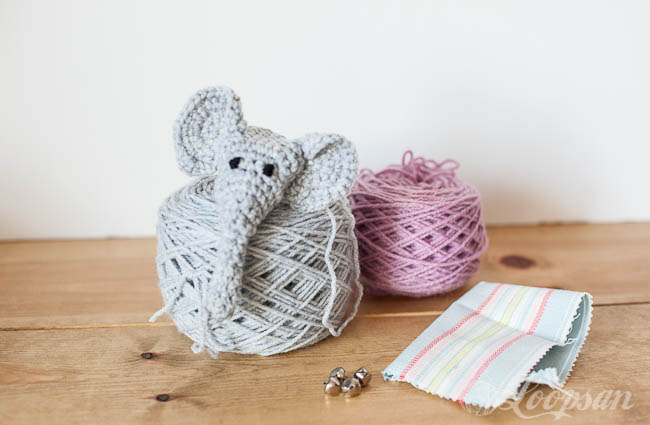
You’ll need:
- Grace :) Or at least her head ;) Follow Dedris pattern for Grace – Elephant Comfort blanket, which you can find here until you reach row 24. Skip row 25, and DON’T fasten off at this point! we’ll be working from there
- DK yarn in a contrast colour (I went for the same colour combo I used for the blanket but feel free to experiment here)
- 4mm crochet hook
- Rattle insert or jingle bells and a tiny bit of cotton fabric
- tapestry needle

Abbreviations
ch= chain
sc= single crochet (US term); double crochet (dc, UK term)
sl st = slip stitch
st= stitch(es)
In my patterns, UK terms are always given in brackets.
Let’s get started:
First of all, as I didn’t have a rattle insert I made my own with the stuff I had on hand. It does work but to be honest for the next rattle I would go with a proper rattle insert. It will make things much easier, especially when you keep in mind that the rattle will get washed often.
Rattle insert
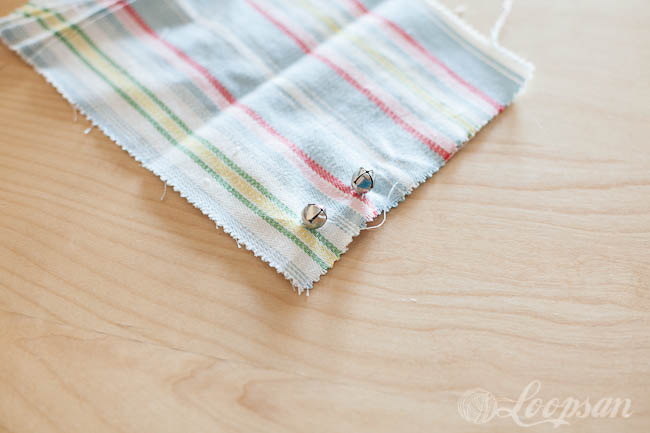
Sew your jingle bells onto your fabric. make sure that they’re a bit apart. As we’re going to hide this rattle insert in the head it doesn’t matter how good or bad it looks like it just needs to be SECURELY attached to a piece of COTTON fabric. Even though it is very very unlikely that this insert will come out of the rattle you ALWAYS want to make sure that there is no change for the little one to swallow one of the jingle bells!
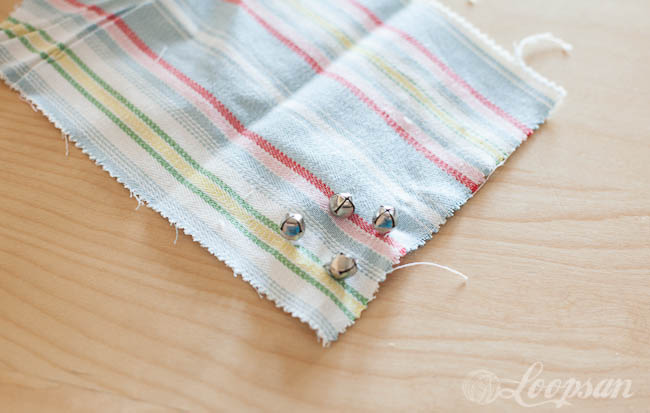
I used four jingle bells for my insert but that’s really up to you. Feel free to experiment around, it also depends on the actual size of your jingle bells.
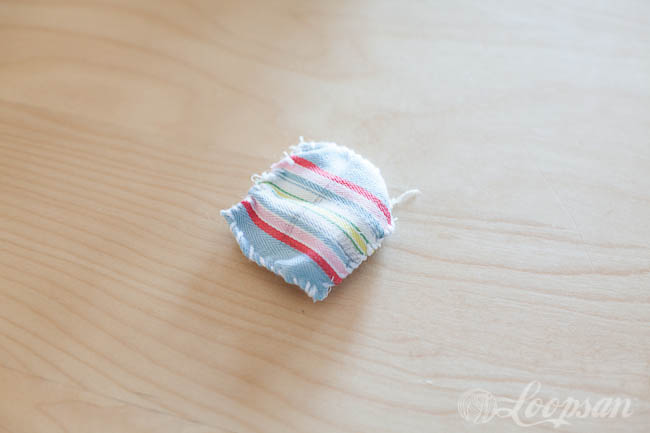
Now fold your piece of fabric in half and sew it together. Make sure that there is still a little bit of “play” between the two layers of fabric, otherwise your bells won’t jingle anymore.
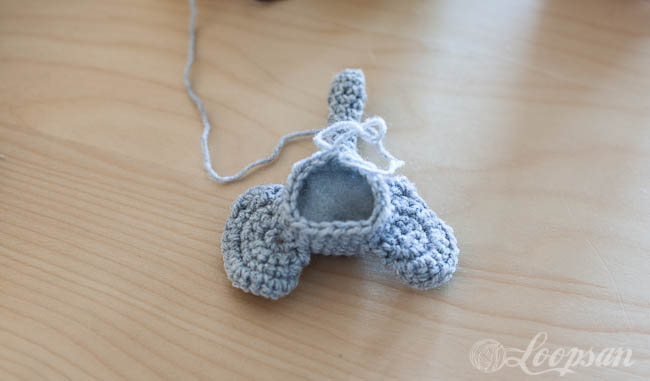
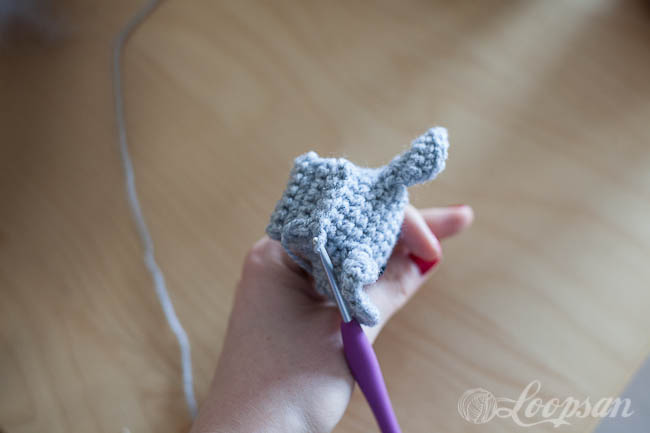
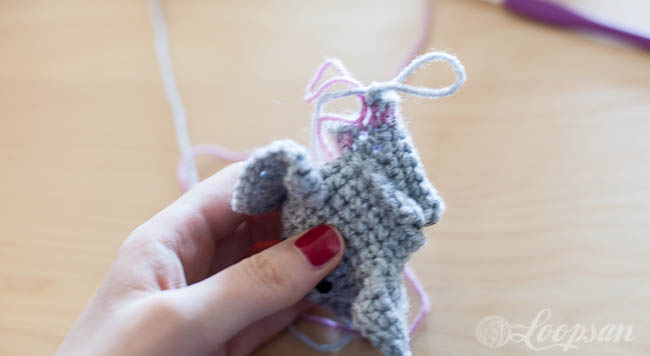
Take your Grace head and slightly stuff it.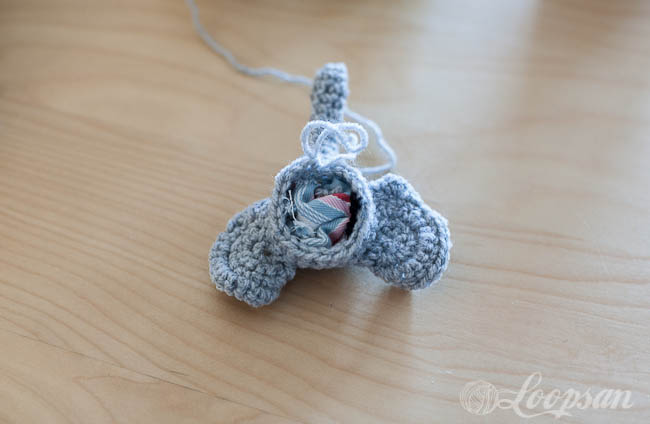
Insert your rattle insert into your head. In the case of the self-made version make sure that you don’t stuff it too densely into the head, otherwise, you’ll end up with a rattle that actually doesn’t rattle at all.
Now it’s finally time to get some crochet going on here:
Rattle pattern
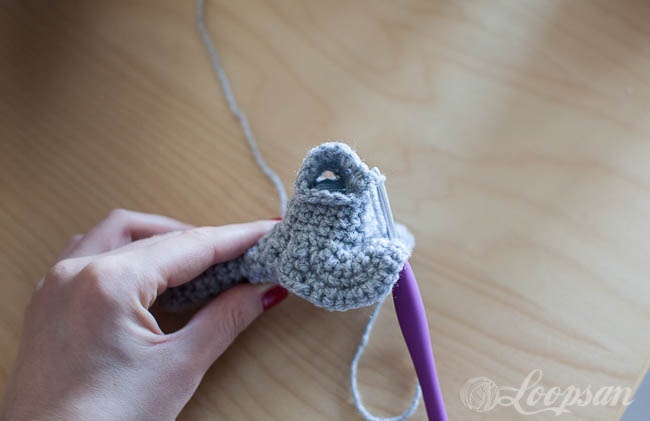
Row 1: starting from where you stopped with the Grace head pattern, sc (dc) in the next 3 st, ch 1 and turn
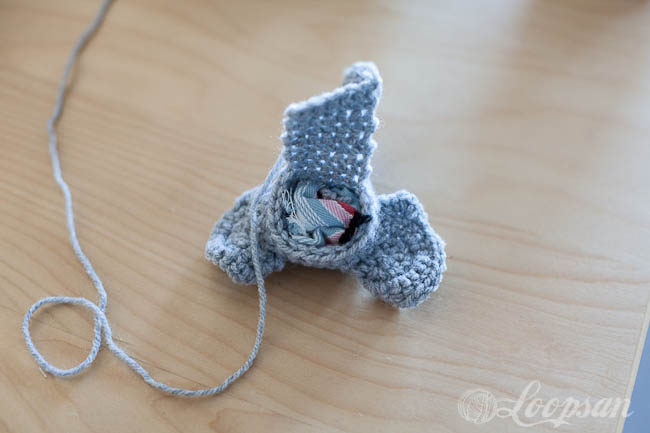
Row 2-8: sc (dc) in the next 6 st, ch 1 and turn
Row 9: fold the piece you just made over and “sew” it on the other side with 6 sl st.
That’s how your piece will look like after round 9. From now on we’ll be working in rounds again.
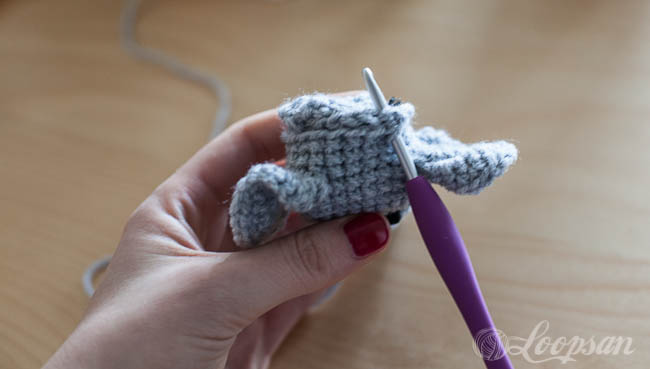
Round 1: 5 sc (dc) in front loops only, 9 sc (dc) evenly spread over the piece of fabric you just created, draw up your last loop a little bit but don’t fasten off at this point.
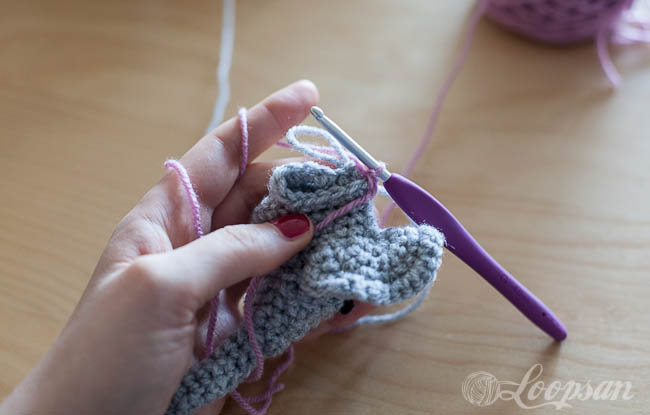
Round 2: sl st your contrast colour into the next st
14 sc (dc) around, draw up your last loop again. As you can see in the picture you’ve got now two “working” loops.
Row 3: Insert your hook into your grey working loop and 14 sc (dc).
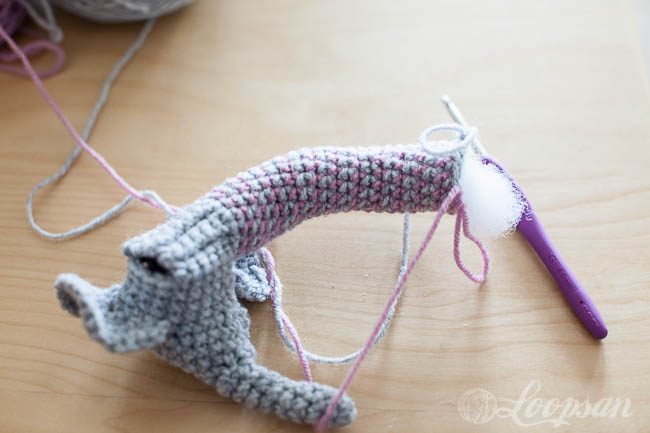
continue with changing the colour like this, you’ll see that you’re creating a spiral tube. Stuff your tube along the way.
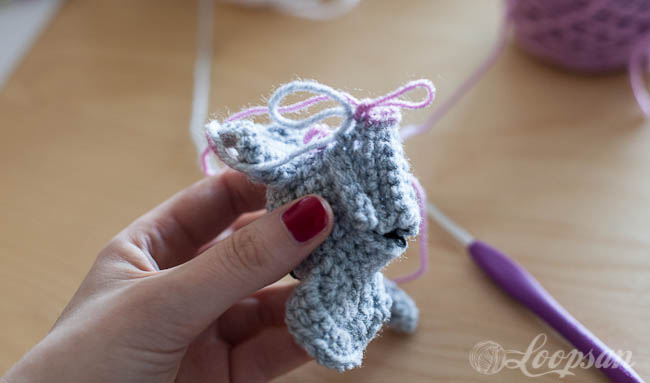
continue until you reached your desired rattle diameter. I made 27 rounds of contrasting colour but that’s totally up to you and also depends on the yarn you’re using and your tension. Fasten off your contrasting colour.
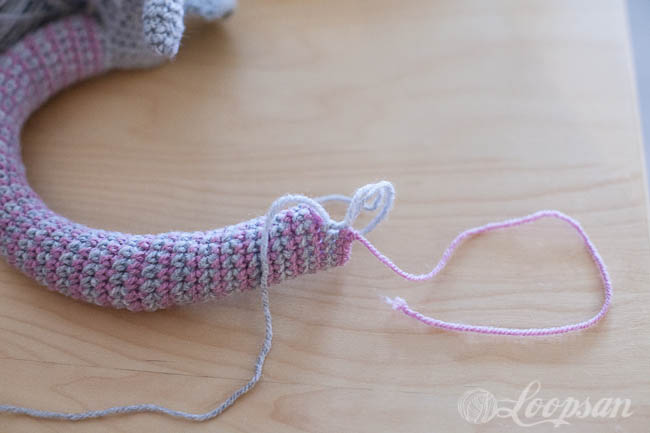
The last bit is the only really tricky bit of the whole rattle and you’ll notice that it is easier to attach if your diameter is slightly bigger rather than smaller as otherwise there is too much tension on the seam.
make 9 sl st across the back and 5 sl st through the front loops only to turn your ring into a doughnut.
As you can see in the picture you can slightly see the seam. It’s not dramatic in my opinion but if you’ve got an idea how to seamlessly connect the tubes, I would be very happy if you would tell me :)
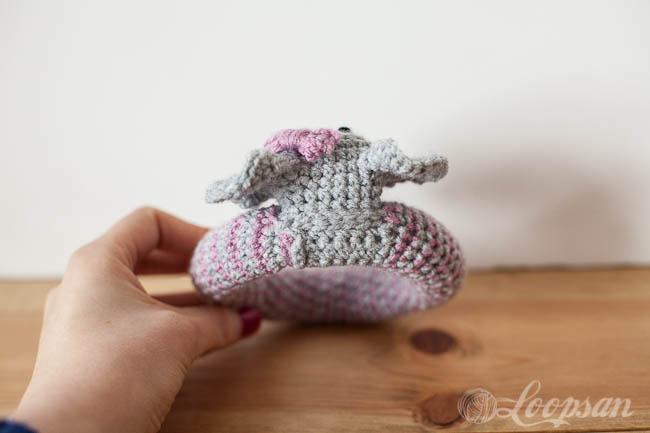
To make Grace a little bit more girly I attached, like I did with the blanket before, a little bow on her head.
ch 9
Row 1: sc (dc) in second st from the hook, sc (dc) in every st, turn (8 st)
Row 2-3: ch 1, sc (dc) in every st (8 st)
I hope you enjoyed the pattern and would love to see how your rattle turned out so please feel free to post a picture to my Facebook wall or link the project to your Ravelry account. And don’t forget to follow me on bloglovin to stay updated on what’s happening here.
Stay updated and receive exclusive discount codes in your email inbox

Happy Crocheting!

Disclaimer: This pattern is not for resale so please do not sell it to other people. If you do use it and enjoy it, I’d be grateful for a link back to my blog and the pattern, but please don’t copy and paste it to your website or copy my pictures. You’re allowed to sell finished items created with the pattern, but please do give me and Dedri Uys from lookatwhatImade credit as the designers (link back to our blogs when selling online). Thank you!


6 Comments
Gorgeous, San. Thank you so much for posting the pattern. Such pretty photos!
That’s just sooo damn cute!
I love this rattle. I will have to try this . I made the lovey and this will make a perfect companion. Thanks for sharing.
Great! Can’t wait to see how it’ll turn out :)x
You and Dedri need to stop! This is TO CUTE!!! And me with no darling baby girl to make this for. Come on people stop having boys, we need a girl ;)
Thanks for the pattern. I may just make it anyway ;)
I love elephants and already made the Grace Blanket. This is a perfect addition! Can’t wait to make soon.